


Table of contents
- Step 1: Prerequisites
- Step 2: Create an S3 Bucket for Hosting
- Step 3: Enable Static Website Hosting
- Step 4: Upload Your Website Files
- Step 5: Allow Public Access
- Step 6: Setting Up Version Control with CodeCommit
- Step 7: Push Your Website Code to CodeCommit
- Step 8: Create a CodePipeline
- Step 9: Trigger Your CI/CD Pipeline
- Step 10: Wrapping Up
Follow along with this simple step-by-step guide to set up a 2-stage CI/CD pipeline for a static website, leveraging Amazon S3, AWS CodeCommit, and AWS CodePipeline.
Step 1: Prerequisites
Before you begin, make sure you have the following prerequisites:
An AWS account.
A static website (HTML, CSS, JavaScript) ready to be deployed.
Tip: Explore free-css.com/free-css-templates for free CSS templates suitable for your project.
If you prefer not to use a template, no worries! We will use a simple index.html file as an example.
Step 2: Create an S3 Bucket for Hosting
Log in to your AWS Management Console.
Navigate to the S3 service.
Click "Create Bucket."
Select a region for your bucket (ideally close to your target audience).
Choose a globally-unique name for your bucket (e.g., my-static-website-456).
It is best practice to enable versioning to maintain a history of your files.
Keep the default settings for other options and create the bucket.

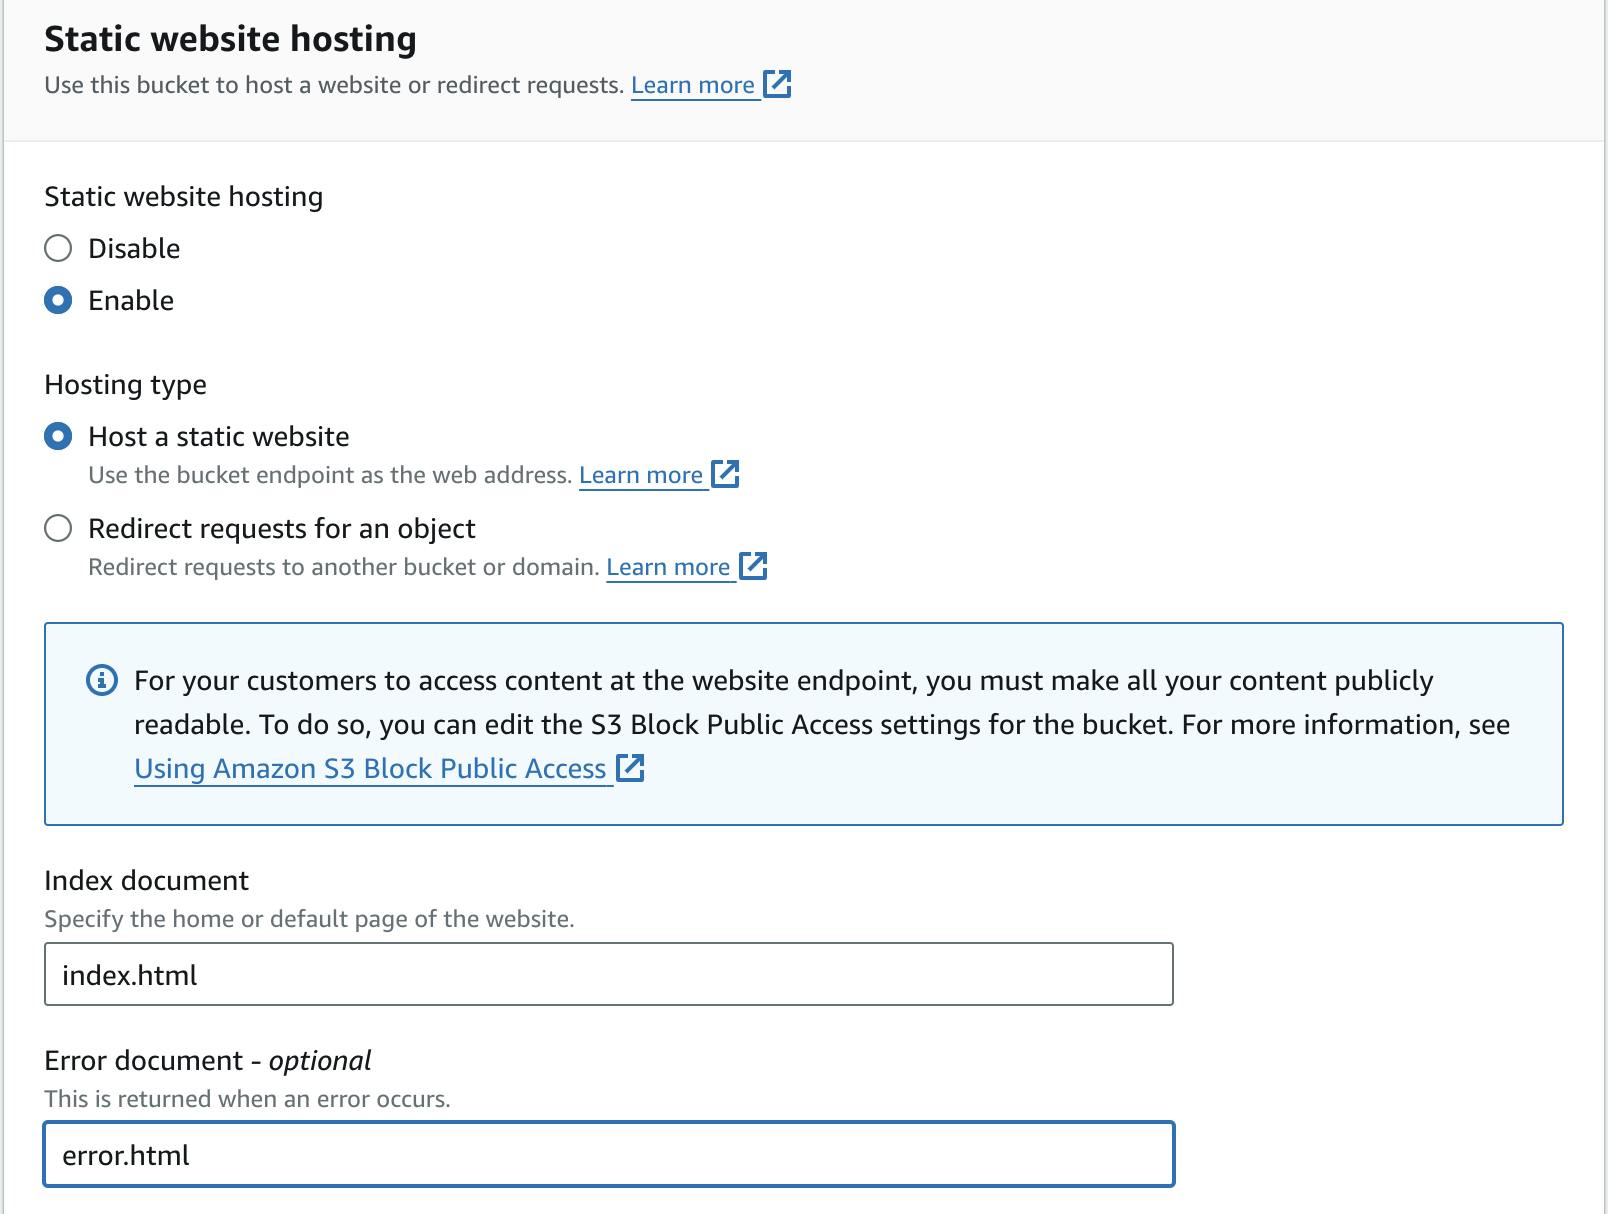
Step 3: Enable Static Website Hosting
In the S3 bucket settings, go to the "Properties" tab.
Scroll down to the "Static website hosting" section. Click "Edit."
Enable static website hosting and select "Host a static website" as the type.
Set the index document (index.html).
Optionally, set the error document if you have one (error.html).
Save the changes.
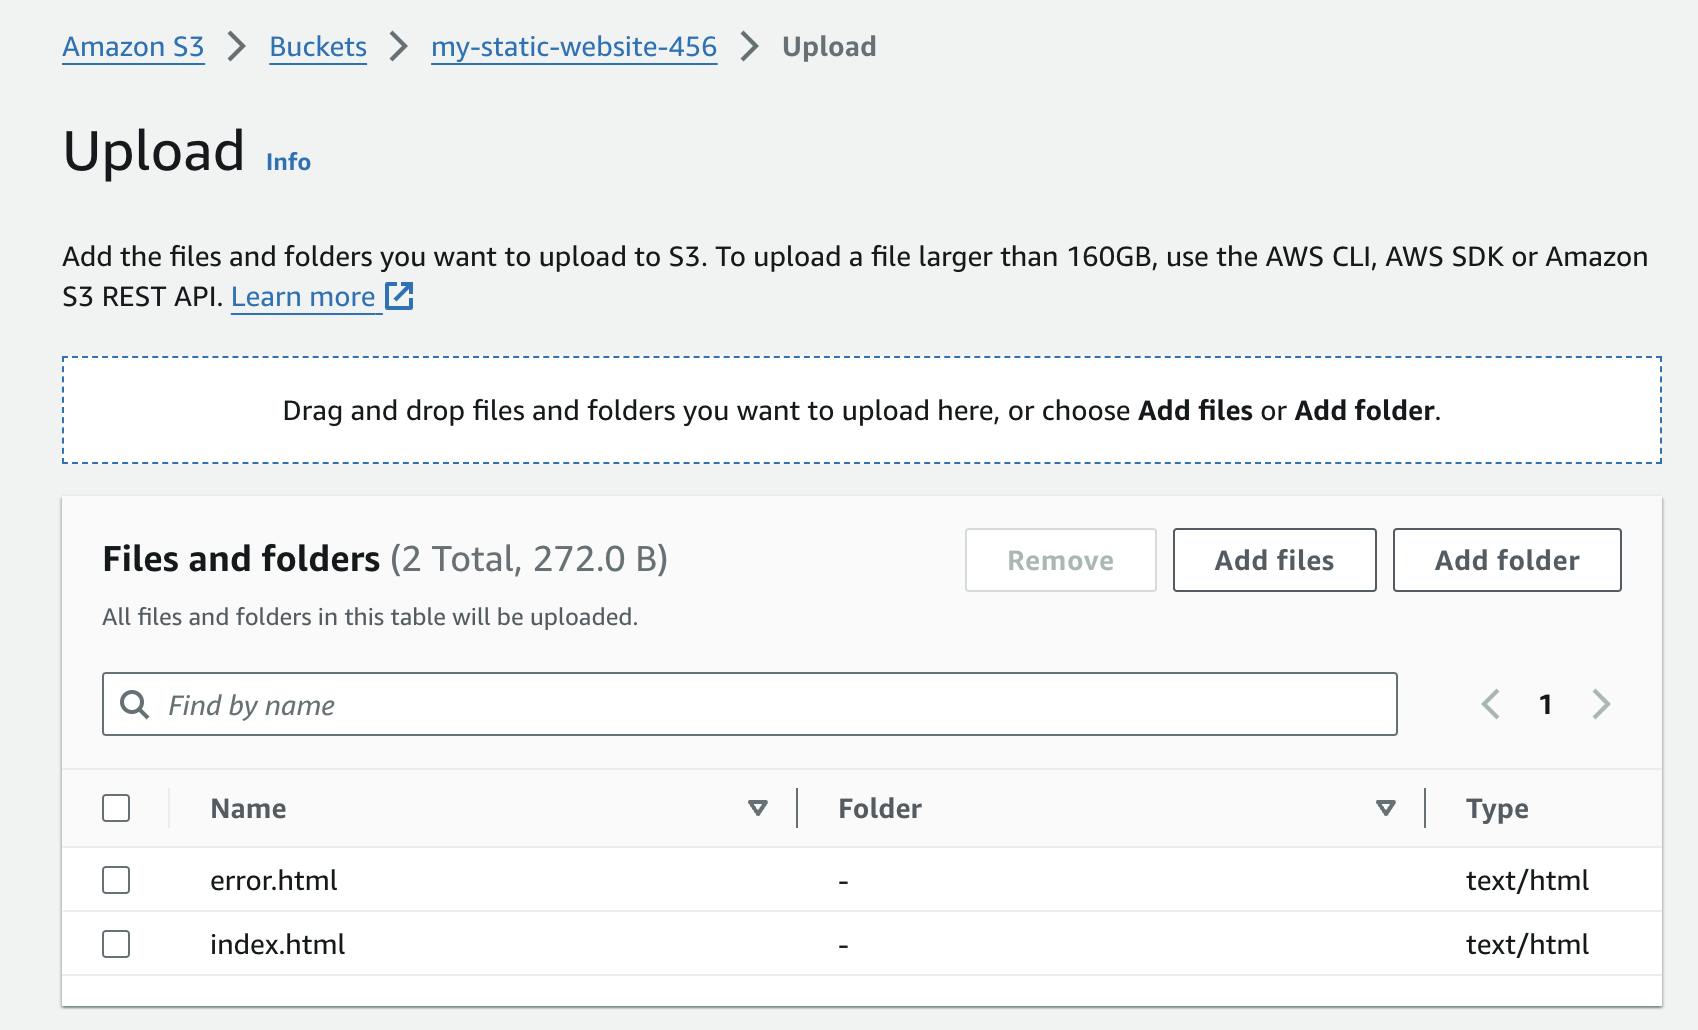
Step 4: Upload Your Website Files
In the S3 bucket, go to the "Objects" tab.
Click "Upload."
Upload all your website files (HTML, CSS, JavaScript) to the bucket.
For the following example, we will create a simple index.html file.
<!DOCTYPE html>
<html lang="en">
  </head>
  <body>
    <main>
        <h1 style="color:rgb(12, 36, 144)">WELCOME TO OLGA'S DEVOPS WEBSITE!</h1>
    </main>
    <script src="index.js"></script>
  </body>
</html>
Let's also use a simple error.html file:
<h1 style="color:Red;">Error. This page is not available.</h1>
Create the files in a code editor, like VS Code, then save and upload them to the bucket.
Step 5: Allow Public Access
In the S3 bucket, go to the "Permissions" tab.
Find the "Block public access" section and click "Edit."
Uncheck the box next to "Block all public access" and save the changes.
Still in the "Permissions" tab, scroll down to "Bucket policy" and click "Edit."
Insert the following under "Policy":
Make sure to change the bucket name under "Resource" if you chose a different name. This policy uses the example bucket name "my-static-website-456." If you'd like to build the policy on your own, click "Add new statement" on the right.
{
    "Version": "2012-10-17",
    "Statement": [
        {
            "Sid": "PublicRead",
            "Principal": "*",
            "Effect": "Allow",
            "Action": [
                "s3:GetObject"
            ],
            "Resource": [
                "arn:aws:s3:::my-static-website-456/*"
            ]
        }
    ]
}
Test your static website's public access by using the bucket website endpoint:


Step 6: Setting Up Version Control with CodeCommit
Go to the CodeCommit service in the AWS Management Console.
Click "Create Repository."
Provide a name for your repository and choose the default options.

Step 7: Push Your Website Code to CodeCommit
Clone the CodeCommit repository to your local machine. AWS provides the instructions for cloning the repository.

You can also go into the repository and click "Clone URL" on the top right.
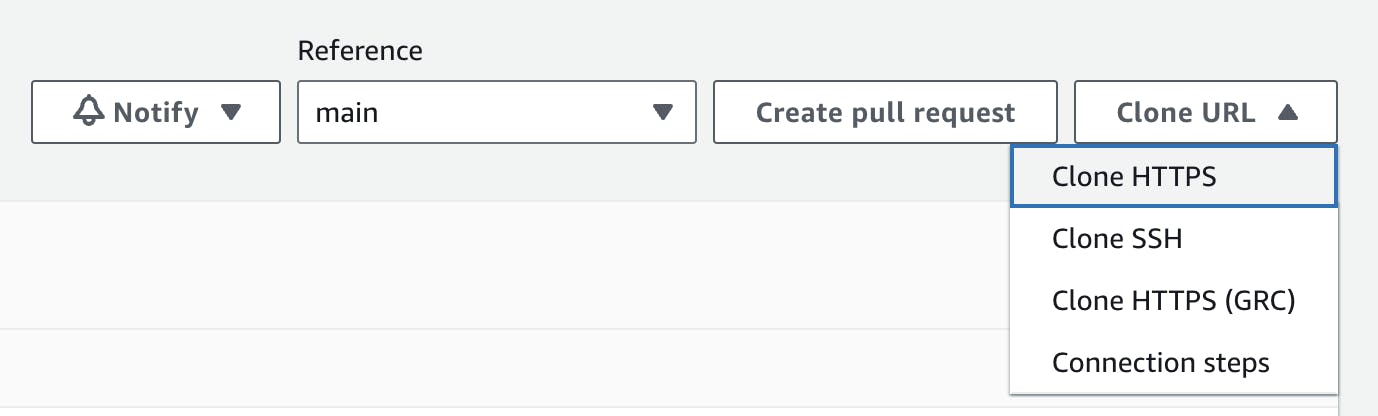
Note: You will need to generate HTTPS Git credentials for your IAM user. You can click "Generate Git Credentials" in step 2 under connection steps. Conversely, you can head to the IAM user settings and scroll down to the HTTPS Git section under the "Security credentials" tab:

Copy your website code into the local repository.
From a code editor, like VS Code, commit and push the website code to the CodeCommit repository. In the terminal of the code editor, make sure you are in the directory with the website files. Use the following commands:
git add .
git commit -m "adding website files"
git push
You should now see your files appear in the CodeCommit repository.

Step 8: Create a CodePipeline
Go to the CodePipeline service in the AWS Management Console.
Click "Create pipeline."
Provide a name for your pipeline.
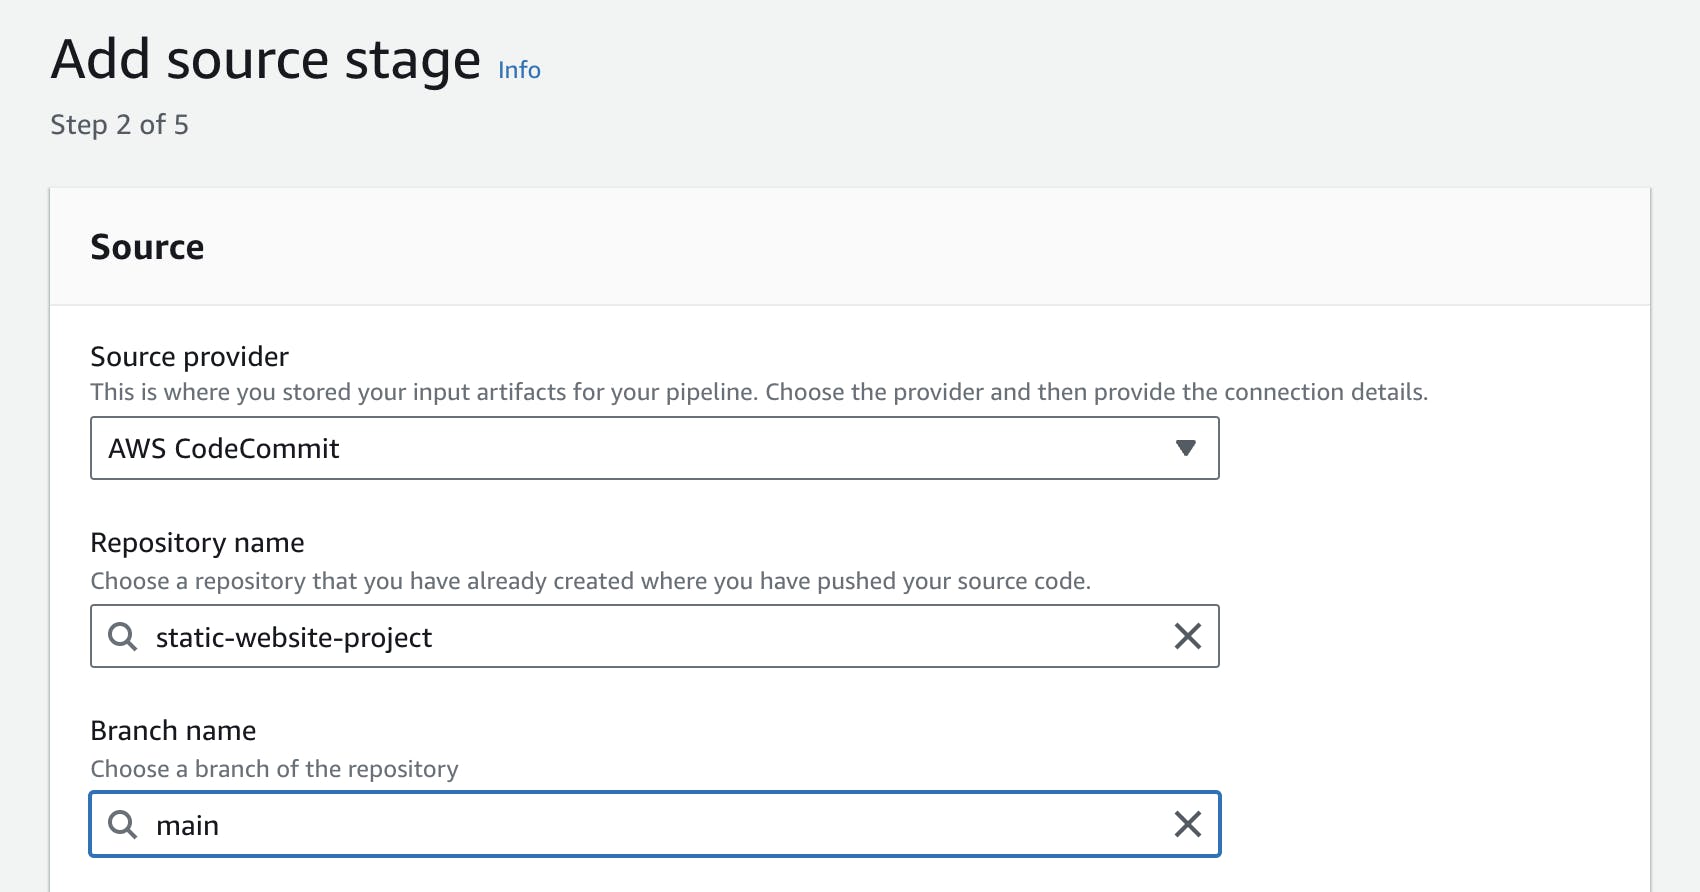
In the "Source" stage, choose the CodeCommit repository.
Skip the "Build" stage for this simple 2-stage pipeline.
In the "Deploy" stage, choose the S3 bucket created for hosting the static website.
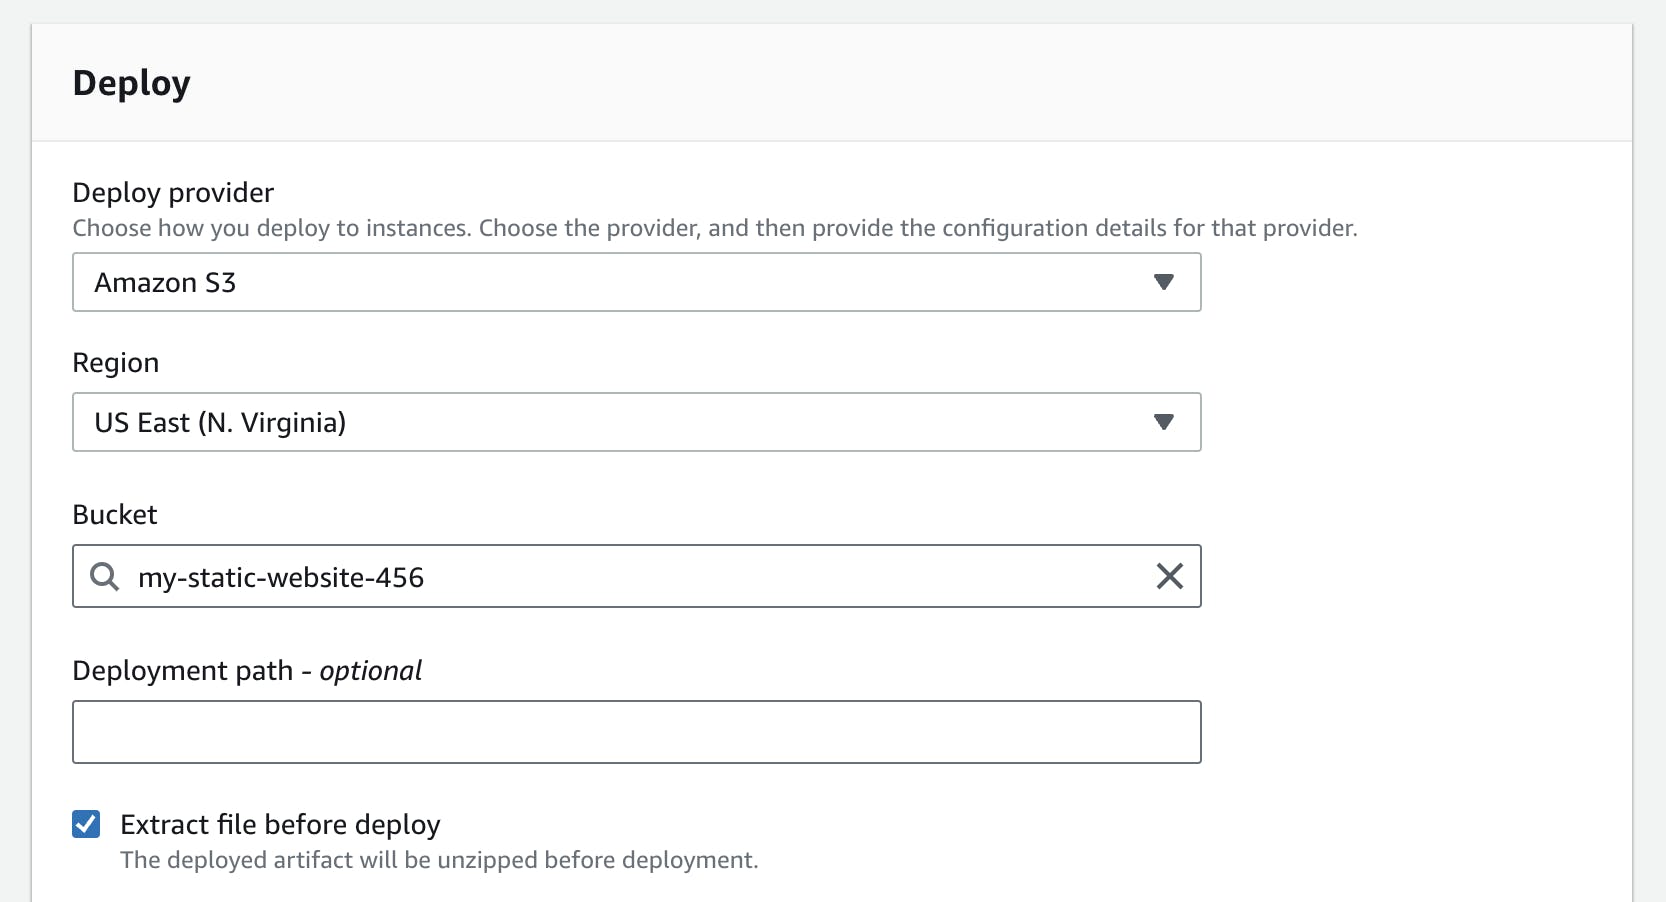
Review and create the pipeline.
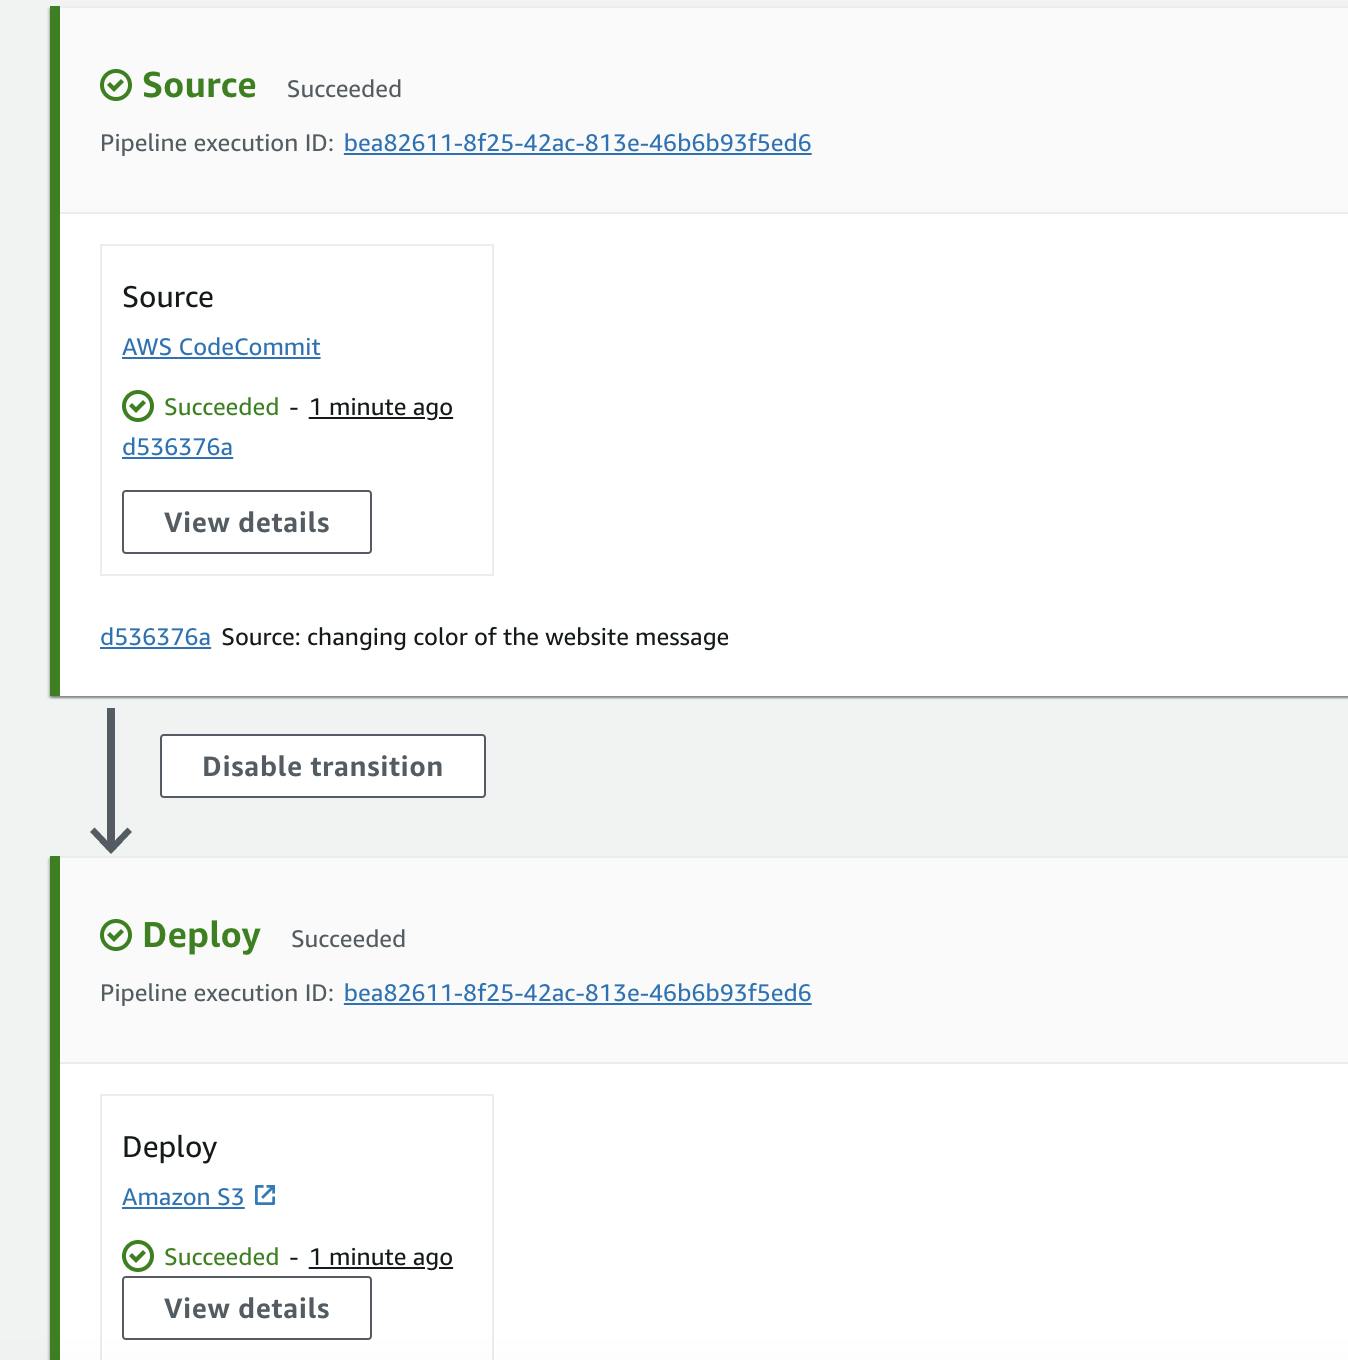
Step 9: Trigger Your CI/CD Pipeline
Make a modification to your website's code and push it to the CodeCommit repository. This action should trigger the CI/CD pipeline, automating the deployment of your website to the designated S3 bucket.
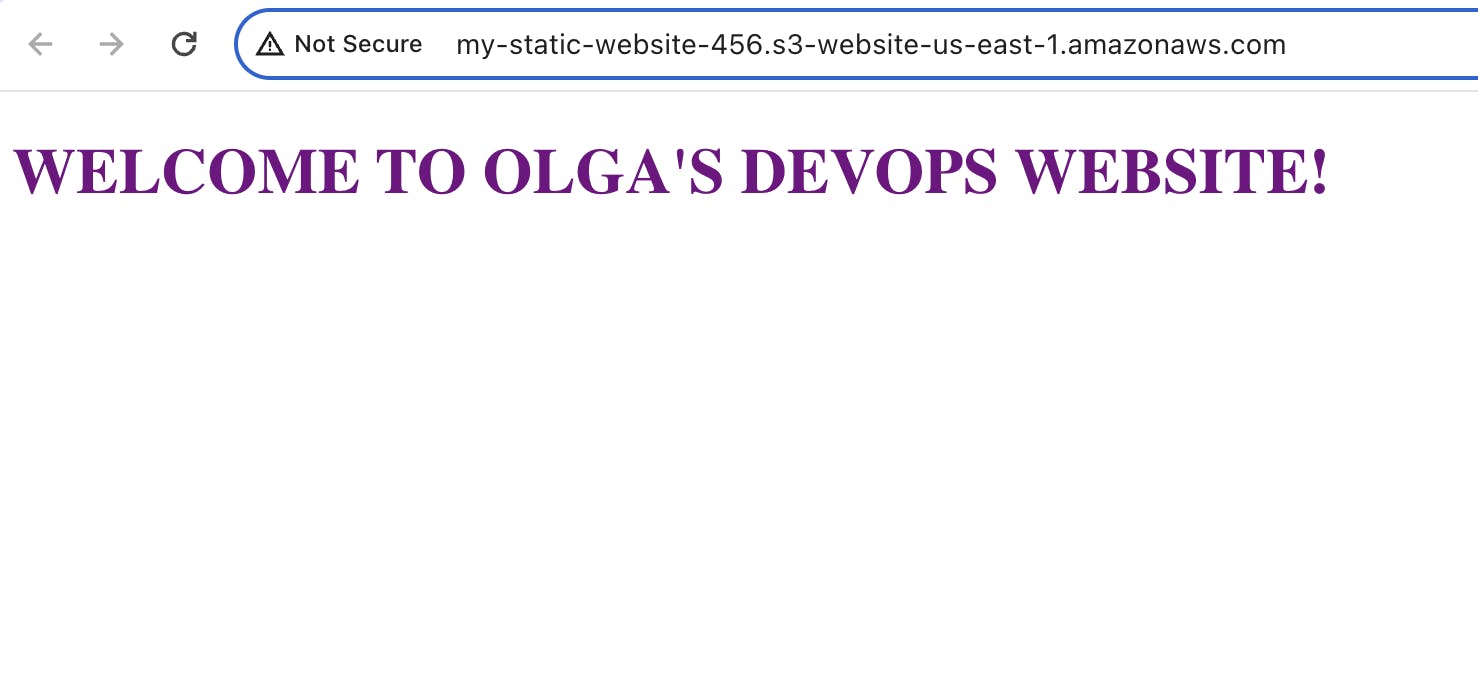
For example, you can change the color of the message on your website in VS Code, push it to the CodeCommit repository, and navigate to the bucket website endpoint. Let's change the color from blue to purple. You will see the changes reflected in the website automatically thanks to your newly created pipeline!
Step 10: Wrapping Up
This simple CI/CD project on AWS demonstrates the process of automating the deployment of a static website using AWS services like S3, CodeCommit, and CodePipeline.
After finishing the project, don't forget to delete the resources you created.
You can further enhance and customize this pipeline to meet the needs of your project. Most importantly, have fun! 🥳